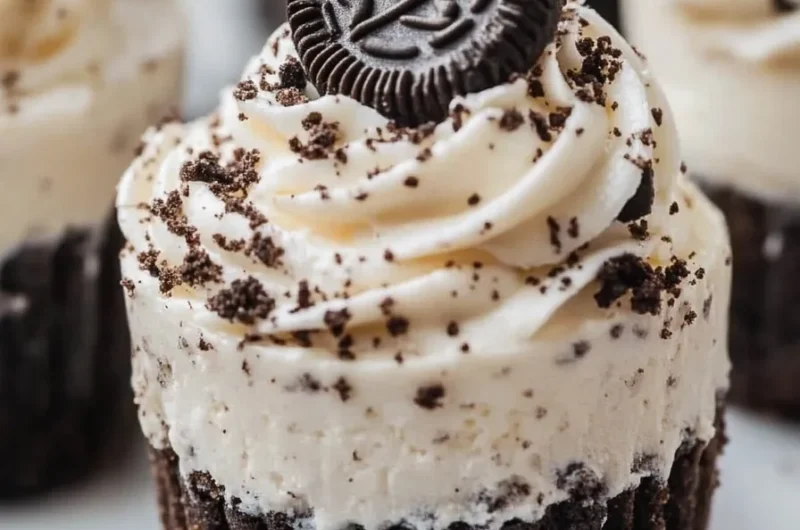
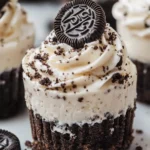
Oreo No-Bake Cheesecake Cups are an incredible dessert that combines the rich taste of cream cheese with the delightful crunch of Oreo cookies. This easy-to-make treat is perfect for any occasion, whether it’s a family gathering, birthday celebration, or simply a sweet craving. With its luscious layers of creamy cheesecake filling and crumbled Oreos, these cups provide a delightful experience for anyone lucky enough to indulge.
When you take your first bite of an Oreo No-Bake Cheesecake Cup, you’ll discover a delightful contrast of textures. The smooth cheesecake filling perfectly complements the crunchy Oreo layer, making it a winning combination. Additionally, the simplicity of the recipe allows even novice bakers to whip up these delicious cups with ease. In this guide, you will find everything you need to know about making Oreo No-Bake Cheesecake Cups, from the ingredients required to serving suggestions that will impress your guests.
The versatility of this recipe is another reason you’ll fall head over heels for it. You can customize it with various toppings, such as chocolate sauce or whipped cream, to suit your taste preferences. Not only do these cups look elegant and inviting, but they’re also a guaranteed crowd-pleaser. Step into the world of Oreo No-Bake Cheesecake Cups and discover why this recipe is an essential addition to your dessert repertoire!
Why You’ll Love This Recipe
Oreo No-Bake Cheesecake Cups are a dessert loved for various reasons. Some of the highlights include:
1. Quick and Easy – With just five ingredients, these cups come together in no time, making them ideal for busy days.
2. No Baking Required – As the name suggests, this dessert doesn’t need any baking, which saves time and effort.
3. Decadent Flavor – The combination of Oreo cookies and creamy cheesecake creates a mouthwatering flavor that everyone enjoys.
4. Elegant Presentation – Layering the ingredients in clear cups makes for a gorgeous presentation that’s perfect for entertaining.
5. Customizable – You can easily add various toppings or mix-ins based on what you have or prefer, allowing for personal touches.
6. Serves a Crowd – This recipe can be easily scaled up or down, making it perfect for any size gathering.
These factors contribute to the ever-growing popularity of Oreo No-Bake Cheesecake Cups, making them a go-to recipe for both casual and formal occasions. Enjoy the delightful combination of flavors and textures as you dive into this delicious dessert!
Preparation and Cooking Time
Preparing Oreo No-Bake Cheesecake Cups requires minimal time and effort. Here’s a breakdown of the time needed to create these delectable treats:
– Preparation Time: 15 minutes
– Chilling Time: 2 hours (or longer for best results)
These times may slightly vary based on your kitchen equipment and workspace, but generally, you can expect a total of about 2 hours and 15 minutes from start to finish.
Ingredients
– 8 oz cream cheese, softened
– 1 cup powdered sugar
– 1 teaspoon vanilla extract
– 2 cups whipped topping (like Cool Whip)
– 16 Oreo cookies, crushed (plus extra for topping)
Step-by-Step Instructions
Creating Oreo No-Bake Cheesecake Cups is simple and straightforward. Just follow these easy steps:
1. Prepare the Oreo Base: In a medium bowl, crush the Oreo cookies into fine crumbs using a food processor or a rolling pin.
2. Mix Cream Cheese: In a large mixing bowl, beat the softened cream cheese until smooth using a hand mixer or whisk.
3. Add Sugar and Vanilla: Gradually add the powdered sugar and vanilla extract to the cream cheese, mixing until well combined and smooth.
4. Fold in Whipped Topping: Gently fold the whipped topping into the cream cheese mixture using a spatula until everything is mixed evenly.
5. Layer Ingredients: In clear cups or jars, start with a layer of the crushed Oreo cookies, then add a layer of the cheesecake mixture. Repeat the layers until you reach the top of the cup.
6. Add Toppings: Finish each cup with extra crushed Oreos on top for decoration.
7. Chill: Place the cups in the refrigerator and let them chill for at least 2 hours to set.
8. Serve: Once chilled, your Oreo No-Bake Cheesecake Cups are ready to impress!
These easy-to-follow steps will guide you through the process of whipping up these incredible cheesecake cups in no time.
How to Serve
To make your Oreo No-Bake Cheesecake Cups even more enjoyable, consider the following serving ideas:
1. Presentation: Use elegant cups or jars to enhance the visual appeal of your dessert. Layering the cheesecake and Oreo mixture beautifully will captivate your guests.
2. Add Saucers: Drizzle chocolate or caramel sauce on top for an extra touch of sophistication and flavor.
3. Garnish: Add whipped cream dollops or fresh fruit on top of the cups to create a more inviting look.
4. Chilled Serving: Ensure that the cups are served chilled for the best texture and flavor experience.
5. Individual Portions: Since these cups are already in individual servings, they’re easy for guests to enjoy without the need for slicing a larger cake.
By putting thought into how you serve your Oreo No-Bake Cheesecake Cups, you will transform a simple dessert into an unforgettable experience for you and your guests. Enjoy!
Additional Tips
– Use High-Quality Ingredients: For the best flavor, opt for full-fat cream cheese and fresh whipped topping. This will enhance the creaminess of your cheesecake cups.
– Chill Longer for Best Results: If time allows, chill the cups for longer than two hours. This will help the flavors meld together beautifully.
– Layer Smartly: Make sure to distribute the Oreo crumbs evenly between the layers for a consistent taste in every bite.
– Experiment with Flavor: Consider adding a splash of lemon juice or some melted chocolate to the cheesecake mixture for added depth of flavor.
Recipe Variation
Feel free to switch things up! Here are some variations to try out:
1. Peanut Butter Swirl: Add a layer of peanut butter between the cheesecake and Oreo layers for a delicious twist.
2. Mint Oreo Version: Use Mint Oreos instead of regular Oreos to introduce a refreshing flavor.
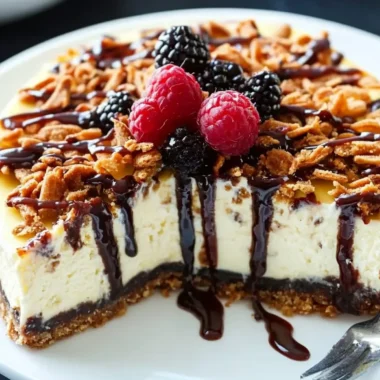
3. Fruit Toppings: Top your cheesecake cups with fresh berries like raspberries or strawberries to add acidity and color.
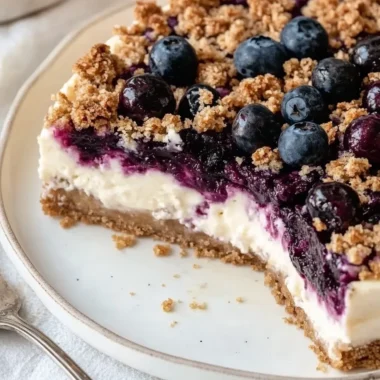
4. Crust Alternatives: Try using graham cracker crumbs or chocolate wafer crumbs for the base instead of Oreos.
Freezing and Storage
– Storage: Keep the cheesecake cups in an airtight container in the refrigerator. They will stay fresh for up to five days.
– Freezing: For longer storage, you can freeze the cups. Ensure they are well-sealed in an airtight container or freezer bags. They can be kept in the freezer for up to three months. Allow them to thaw in the refrigerator before serving.
Special Equipment
A few essential tools will make preparing these Oreo No-Bake Cheesecake Cups easier:
– Mixing Bowls: You’ll need a few different sizes for mixing the cheesecake filling and crumbs.
– Electric Mixer: For quick and easy blending of the cream cheese and whipped topping.
– Measuring Cups and Spoons: Accurate measurements will ensure the best taste and texture.
– Spatula: A silicone spatula will help fold ingredients without deflating the whipped topping.
– Clear Cups or Jars: These will showcase the layers beautifully for presentation.
Frequently Asked Questions
Can I make these cheesecake cups in advance?
Yes! In fact, making them a day in advance can enhance the flavors as they continue to set.
How can I adjust the sweetness of the cheesecake?
You can easily modify the amount of powdered sugar to fit your taste preferences.
What is the best way to crush Oreo cookies?
Using a food processor is the quickest method. Alternatively, place the cookies in a zip-top bag and crush them with a rolling pin.
Can I use dairy-free cream cheese and whipped topping?
Absolutely! There are many dairy-free alternatives available, and they will work well in this recipe.
What if I don’t have whipped topping?
You can make your own whipped cream using heavy cream and sugar. Just whip it until soft peaks form.
Conclusion
Oreo No-Bake Cheesecake Cups are an irresistible combination of creamy cheesecake and crunchy Oreo cookies, making them a go-to dessert for any occasion. With their simple preparation and endless customization options, these delightful cups are sure to impress friends and family alike. Whether served at a family gathering or enjoyed as a sweet treat at home, they are a delicious and effortless way to satisfy your dessert cravings.
Oreo No-Bake Cheesecake Cups: An Incredible 5-Ingredient Recipe
- Total Time: 15 minutes
Ingredients
– 8 oz cream cheese, softened
– 1 cup powdered sugar
– 1 teaspoon vanilla extract
– 2 cups whipped topping (like Cool Whip)
– 16 Oreo cookies, crushed (plus extra for topping)
Instructions
Creating Oreo No-Bake Cheesecake Cups is simple and straightforward. Just follow these easy steps:
1. Prepare the Oreo Base: In a medium bowl, crush the Oreo cookies into fine crumbs using a food processor or a rolling pin.
2. Mix Cream Cheese: In a large mixing bowl, beat the softened cream cheese until smooth using a hand mixer or whisk.
3. Add Sugar and Vanilla: Gradually add the powdered sugar and vanilla extract to the cream cheese, mixing until well combined and smooth.
4. Fold in Whipped Topping: Gently fold the whipped topping into the cream cheese mixture using a spatula until everything is mixed evenly.
5. Layer Ingredients: In clear cups or jars, start with a layer of the crushed Oreo cookies, then add a layer of the cheesecake mixture. Repeat the layers until you reach the top of the cup.
6. Add Toppings: Finish each cup with extra crushed Oreos on top for decoration.
7. Chill: Place the cups in the refrigerator and let them chill for at least 2 hours to set.
8. Serve: Once chilled, your Oreo No-Bake Cheesecake Cups are ready to impress!
These easy-to-follow steps will guide you through the process of whipping up these incredible cheesecake cups in no time.
- Prep Time: 15 minutes
- Cook Time: 0 minutes
Nutrition
- Serving Size: 4 cups
- Calories: 330 kcal
- Fat: 18g
- Protein: 3g